Trekking in the Himalayas is a true adventure experience — a journey into high-altitude wilderness where nature exists in its most raw and powerful form. Every trek comes with physical challenges, unpredictable weather, and varying terrain. Choosing the right trek grade is essential not just for a great experience, but also for safety and proper acclimatization.
To help you make the right choice, treks are categorized into three levels based on altitude, terrain, duration, and overall difficulty:
Easy (Beginner-Friendly Treks):
Ideal for first-time trekkers or those looking for an easy trek in the Himalayas. These treks usually last up to a week, with shorter hiking days, gradual altitude gain, and a maximum altitude of around 14,000 ft. The terrain remains well-defined, often within or near the tree line, with civilization relatively accessible. Weather conditions are more predictable, making these treks safer and easier to manage, with quicker rescue access if required.
Moderate Treks:
Designed for trekkers with some prior experience or good fitness levels. These treks may extend beyond a week and include a mix of short and long trekking days, with altitudes reaching up to 16,000 ft. You move above the tree line into more rugged landscapes — including alpine meadows, moraines, and high-altitude terrain. Weather becomes more unpredictable, and conditions can change suddenly. While still manageable, these treks require better preparation, endurance, and mental strength.
Difficult (Expedition-Level Treks):
These are high-altitude expeditions meant for experienced trekkers. Routes often exceed 17,000 ft and pass through glaciers, snowfields, steep ascents, river crossings, and technical terrain. Treks can last up to two weeks, taking you far from civilization into extreme Himalayan conditions. Weather can shift rapidly, and sections may require technical equipment like ropes or ice axes. Rescue in such regions is complex, making experience, self-sufficiency, and strong mental resilience absolutely essential.
Understanding these categories helps you choose a trek that matches your fitness, experience, and expectations — ensuring a safe, enjoyable, and truly memorable Himalayan adventure.
×
PriceNote – Listed Price & Customisation Rules:
The listed trek price applies to our fixed departures for the specified itinerary. Trek fees including any add-ons for customized groups may vary based on your preferences, ensuring every adventure is tailored to your needs.
Group Booking Offer:
For groups of 8 or more booking together, the trek fee for 1 participant will be waived as a token to encourage shared adventures.
Scholarship for Kids:
Children under 15 years receive a 30% discount on the trek price, making it easier for families to explore the Himalayas together.
×
Transport Price Note:
The transport price mentioned is only an current indicative estimate per person, assuming a Non-AC vehicle like Bolero shared by at least 4 participants. Fewer participants → cost rises; More participants → cost decreases.
Transport Selection During Booking:
Selecting transport during booking informs us of your preference. No payment is collected at booking.
Final Cost & Payment:
Final transport cost will be communicated before departure and to be paid directly to the cab driver.
×
Itinerary Note:
This itinerary represents the most updated plan, but minor adjustments may occur due to operational needs or mountain conditions.
×
Terms & Conditions
Trekking is an adventurous activity that inherently involves a variety of risks and uncertainties. By choosing to trek with Planethimalayas, I acknowledge and accept the following potential hazards:
Natural Threats:
Unpredictable Weather: I understand there is always a possibility of facing sudden rain, cloudbursts, flash floods, or Glacial Lake Outburst Floods (GLOFs), either during the trek or at the campsite. Harsh weather conditions such as hailstorms, thunderstorms, lightning, high-altitude winds, and abrupt temperature drops can not only affect comfort but may also lead to the cancellation of the trek without prior notice.
Wildlife Encounters: Trekking trails may intersect with habitats of wild animals including bears, snakes, and a range of insects or arthropods. These encounters pose serious risks.
Flora Exposure: Some plant species in the trekking regions may be toxic or harmful upon contact or ingestion. I understand that interacting with such vegetation could result in serious consequences.
Natural Calamities: Mountainous terrains are prone to landslides, avalanches, earthquakes, and whiteouts — all of which could significantly endanger life and disrupt the trek.
Altitude and Injury Risks:
High-altitude conditions can lead to Acute Mountain Sickness (AMS), High Altitude Pulmonary Edema (HAPE), or High Altitude Cerebral Edema (HACE).
I understand that trekking surfaces are uneven and potentially slippery. This increases the chance of falls, slips, or injuries — including accidental drowning.
Misuse or malfunctioning of trekking gear (e.g., trekking poles, safety equipment) may also result in accidents.
Accidents during the trek could cause emotional or physical trauma, temporary or permanent disabilities, or even paralysis.
Injuries caused by fellow trekkers or locals are also possible.
I acknowledge that sun exposure, extreme cold, or environmental factors may cause health issues such as sunburn, frostbite, hypothermia, dehydration, heatstroke, chilblains, or hypoxia.
Medical Emergencies:
Trekking routes often lack access to nearby hospitals or clinics. I understand that medical attention may be delayed or unavailable.
I am aware that evacuation due to an emergency may be logistically difficult and time-consuming.
Additional Concerns:
Civil or Political Disturbance: Unrest due to protests, strikes, conflicts, or terrorism may impact trek safety.
Equipment Failures: I accept that gear failure could lead to difficulties or injuries.
Transportation Disruptions: Travel to or from the basecamp may be delayed or disrupted due to vehicle failure, cancellations, or roadblocks.
Disease Exposure: Trekking in unfamiliar regions may expose me to infectious diseases or health risks.
By agreeing to this document, I confirm:
I am fully aware of the above-mentioned risks.
I am voluntarily participating in the trek.
I agree to follow all safety protocols and guidance provided by Planethimalayas staff.
I will take full responsibility for any gear or equipment used during the trek.
I acknowledge that while Planethimalayas’ staff are trained and experienced, they are human and cannot foresee or prevent every risk.
My safety and well-being ultimately remain my responsibility.
I take full ownership of my physical readiness for the trek, based on the eligibility and fitness standards set by Planethimalayas.
Health Statement:
I certify that I am physically and mentally fit.
I have no known medical conditions that could restrict me from undertaking the trek.
No medical professional has advised me against participating in this activity.
Legal Liability:
I confirm that I am solely accountable for my safety throughout the trek.
I voluntarily assume all known and unknown risks involved.
Planethimalayas is not liable for any injuries, illnesses, or losses sustained during or after the trek.
I understand that Planethimalayas will not cover any medical costs I may incur.
Should my actions cause harm or inconvenience to another person or damage to property — whether intentionally or by accident — I agree to compensate Planethimalayas for any resulting expenses. This includes costs related to repairs, medical treatments, or legal actions.
I am aware that high-altitude trekking may cause symptoms related to oxygen deprivation and altitude sickness. If the trek leader believes it is unsafe for me to continue, I accept their decision to descend me to a safer altitude.
I understand that health checks (oxygen level, pulse, blood pressure) will be conducted regularly at various camps. Based on these assessments, Planethimalayas reserves the right to disallow me from proceeding further if my health metrics fall below acceptable standards. These standards are available with trek leaders.
I am aware that the terrain will involve challenging and unpredictable conditions including steep slopes, snow-covered paths, and rocky trails.
If the trek leader concludes that I am physically unable to complete the trek without constant support, I understand that I may be turned around.
Alcohol, tobacco, and any recreational drugs are strictly banned throughout the trek. Consumption of such substances may result in immediate removal from the trek and basecamp.
I have read and fully understood all the terms stated in this agreement. I consent to the conditions knowing the legal impact it may have. Even if any clause here is declared unenforceable, the remainder shall remain valid.
I acknowledge that the trek cost was calculated assuming my full consent to these terms. Without this agreement, Planethimalayas would not be able to offer the trek services.
I agree that my electronic or digital acceptance of this agreement shall hold the same validity as a signed physical document.
It is solely my duty to carry all necessary documents related to this trek (passport, ID, permits, visa, etc.). Planethimalayas will not be held responsible if I fail to present these documents when required.
Planethimalayas also disclaims liability in case of loss, theft, or damage to any personal identification or travel documents.
I voluntarily consent to provide my Aadhaar number for use by Planethimalayas in matters related strictly to identity verification, trek permit processing, and administrative formalities. This data will be used solely for these purposes in accordance with Indian law. I understand I may withdraw this consent prior to its usage by submitting written notice.
I agree to abide by the cancellation policy of Planethimalayas as outlined in the official document.
🩺 Basic Medical Support – On-trek first aid and support for minor medical issues
👥 Support Staff – Team includes experienced trek leaders, local guides, cooks, and helpers
🎯 Qualified Leadership – Professional trek leader overseeing safety and coordination
❌ Exclusions
🚑 Insurance – Travel or medical insurance is not included
🚨 Emergency Costs – Expenses for evacuation, rescue, or medical treatment are not covered
🎒 Backpack Offloading – Available as an optional add-on at an extra charge
🚗 Travel to/from Base Camp – Transport to the trek base or return is not part of the package unless opted separately
🛍️ Personal Purchases – Items bought on the way (snacks, gifts, souvenirs, etc.) are not included
👕 Personal Trek Gear – Jackets, shoes, walking sticks, or toiletries are not part of the package (can be rented separately)
❗ Anything Not Listed Above – If it’s not mentioned under inclusions, it is not covered by Planethimalayas
×
Cancellation & Refunds
At Planethimalayas, we strive to make your trekking experience smooth and transparent. Please read our cancellation policies carefully:
1. Trek Cancellation by Participant
Within 30 days prior to departure: Full refund of trek fees.
Between 30 to 15 days prior to departure: 20% of trek fee will be retained; the remaining amount will be refunded.
Less than 15 days prior to departure or no-show: No refund.
2. Trek Cancellation by Planethimalayas
In the unlikely event that Planethimalayas cancels a trek due to weather, natural disasters, political unrest, or any unforeseen circumstance, we will provide you with the option to join another trek of the same value or issue a full refund.
3. Refund Policy
Refund Method: All approved refunds are issued as vouchers tied to the specific participant's account and can be used for future treks. Direct cash or online refunds are not provided.
4. Rescheduling & Changing Treks
Rescheduling a trek to a different date is free of charge.
Changing to a different trek must be requested at least 30 days prior to departure.
If the selected trek is of higher price, the extra amount must be paid.
If the selected trek is of lower price, the remaining amount will be refunded within 10 days after trek completion.
Requests made within 15 days of departure are handled on a case-by-case basis.
5. Transport & Offloading Bag Add-on Cancellation
Cancellation more than 72 hours prior to departure: Full refund.
Cancellation within 72 hours or post that period: No refund possible.
Important Note: In case of emergencies or rescue operations, any transportation used during such processes will not be considered part of the Transport add-on, and trekkers must bear all costs incurred. It is strongly recommended to purchase proper trek insurance to claim such costs as per your insurance policy.
6. Cancellation Requests
All cancellations must be processed through email only. No other form of communication will be considered official. Our official email address:
info@planethimalayas.com
Transportation – INR 4,000 (* Dehradun to Dehradun)?
Offloading Bags – INR 1,500 (* Maximum weight 9kg/bag)
Need a different date?
We can arrange a custom departure if 3+ trekkers align.
Walking The Trail
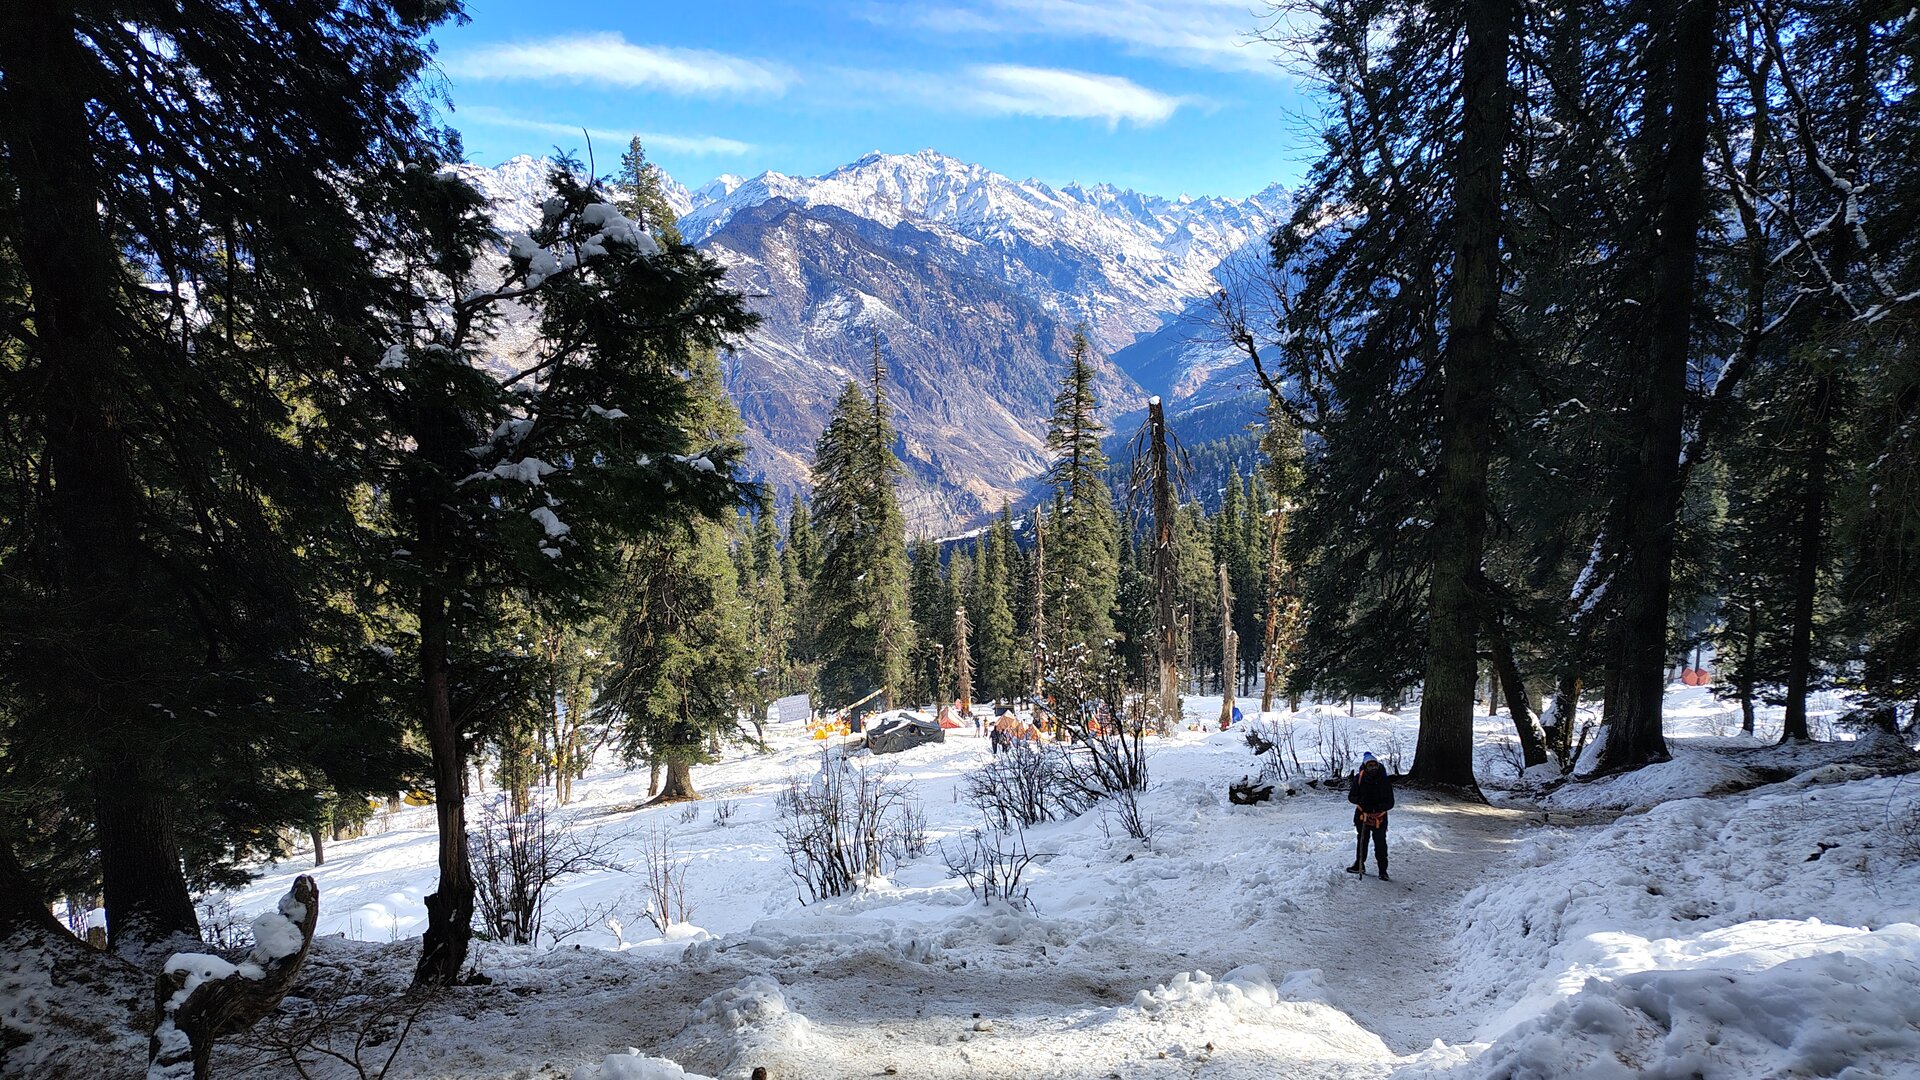
The Kedarkantha Trek begins quietly, almost gently, in the wooden lanes of Sankri — a village where smoke curls from slate roofs, prayer flags flutter in the cold air, and the Himalayas feel close enough to touch. As you step onto the trail, the outside world fades away. Pines rise tall and straight around you, oak and maple branches arch overhead, and the crunch of snow beneath your boots becomes your steady rhythm. Sunlight filters through the forest canopy, catching on frost-covered needles and turning the path ahead into a glowing corridor of winter.
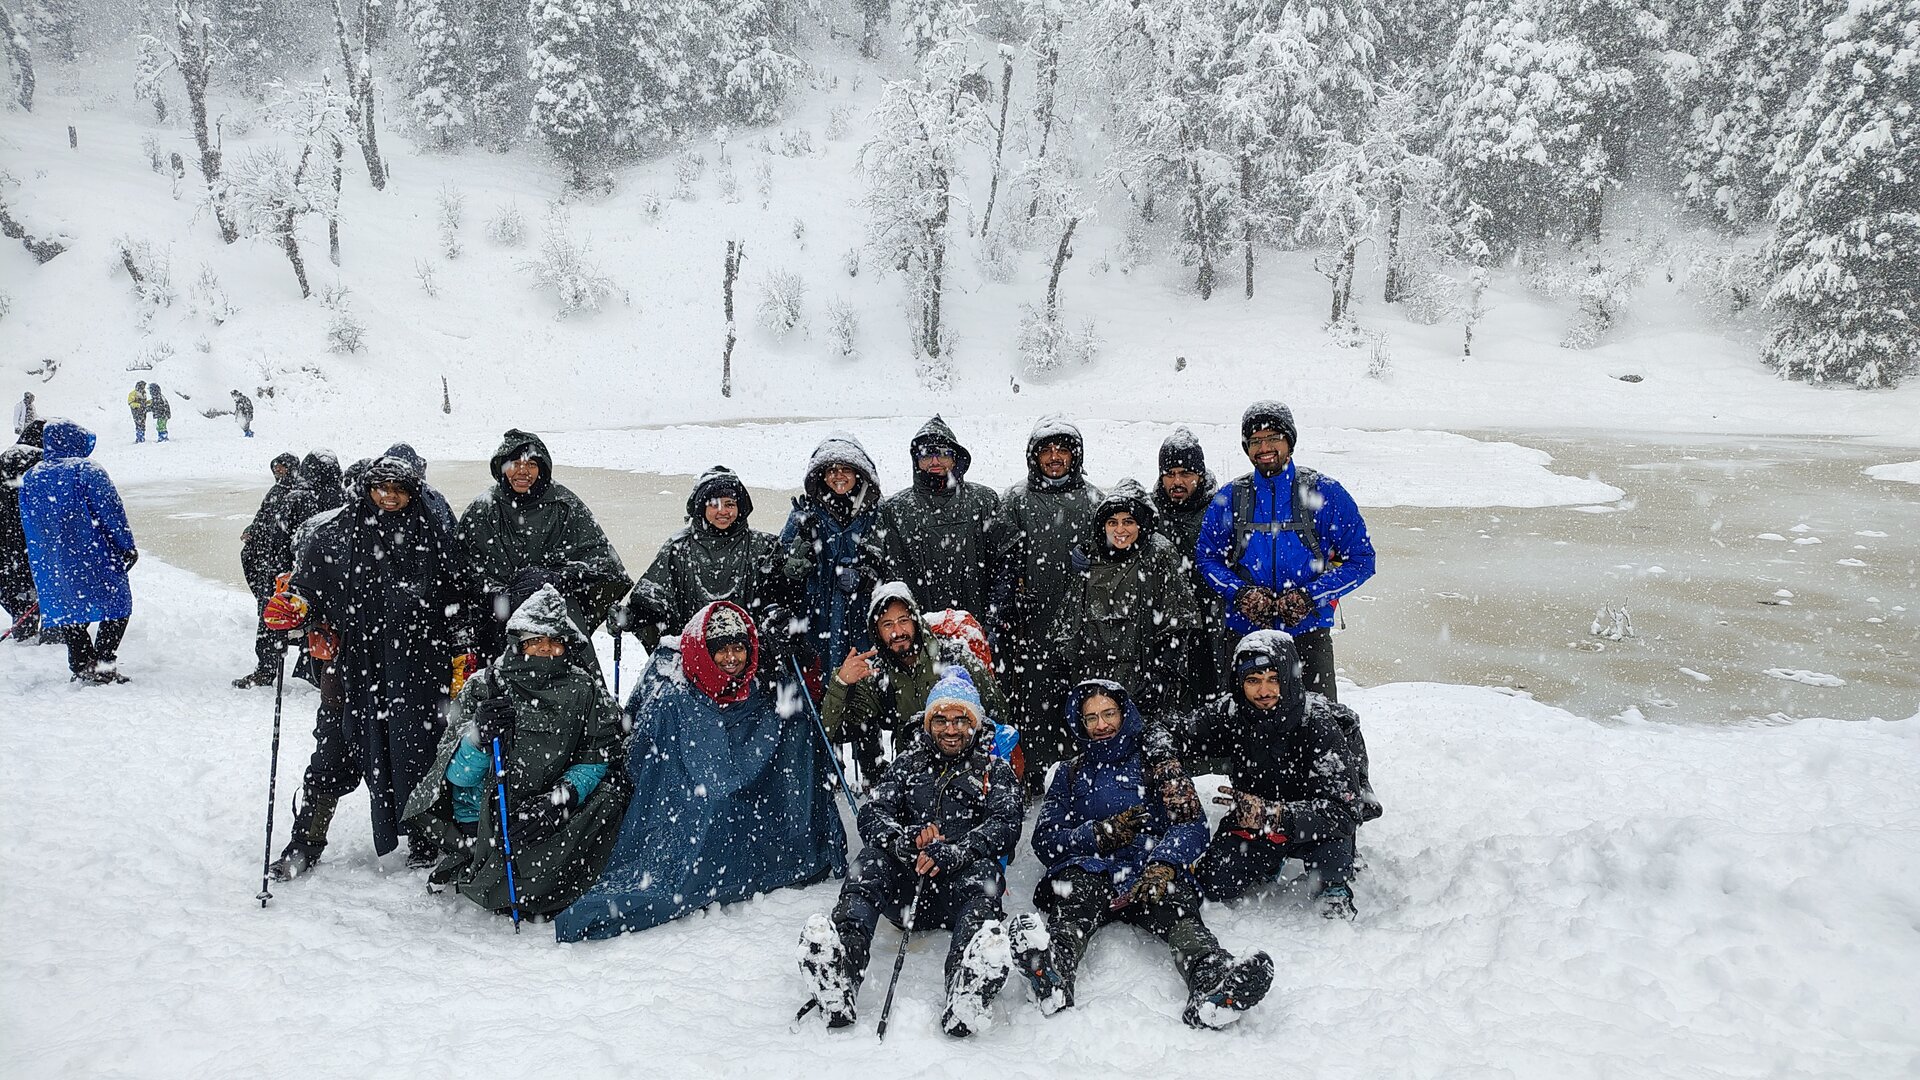
Gradually, the forest deepens. The air grows sharper, cleaner, and silence settles in — broken only by the wind brushing through trees or the soft crack of frozen streams hidden beneath snow. Then, without warning, the trees open up to reveal Juda Ka Talab. In winter, the lake lies perfectly still, locked beneath a sheet of ice, reflecting the surrounding forest like a frozen mirror. Camps here feel otherworldly — tents pitched beside ancient trees, evening skies turning pink and violet as darkness falls, and stars emerging brighter than you ever remember them.
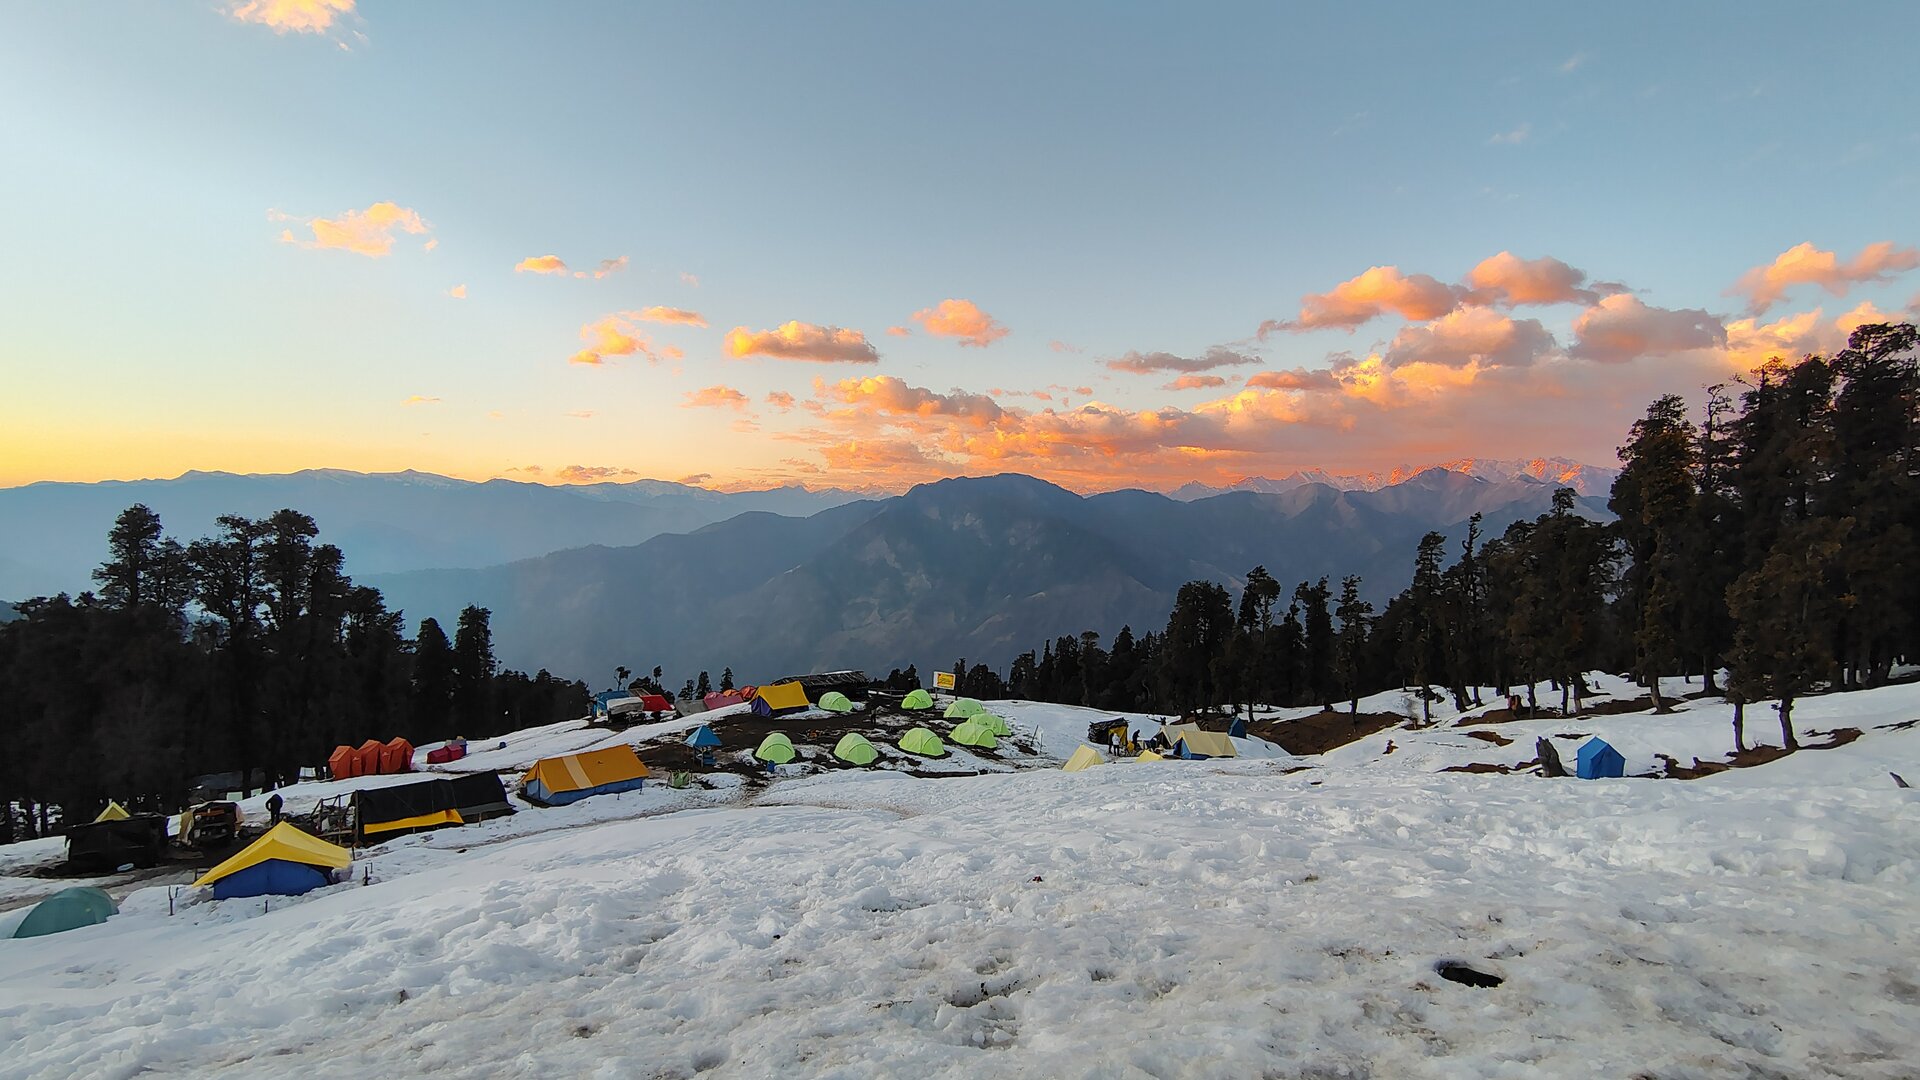
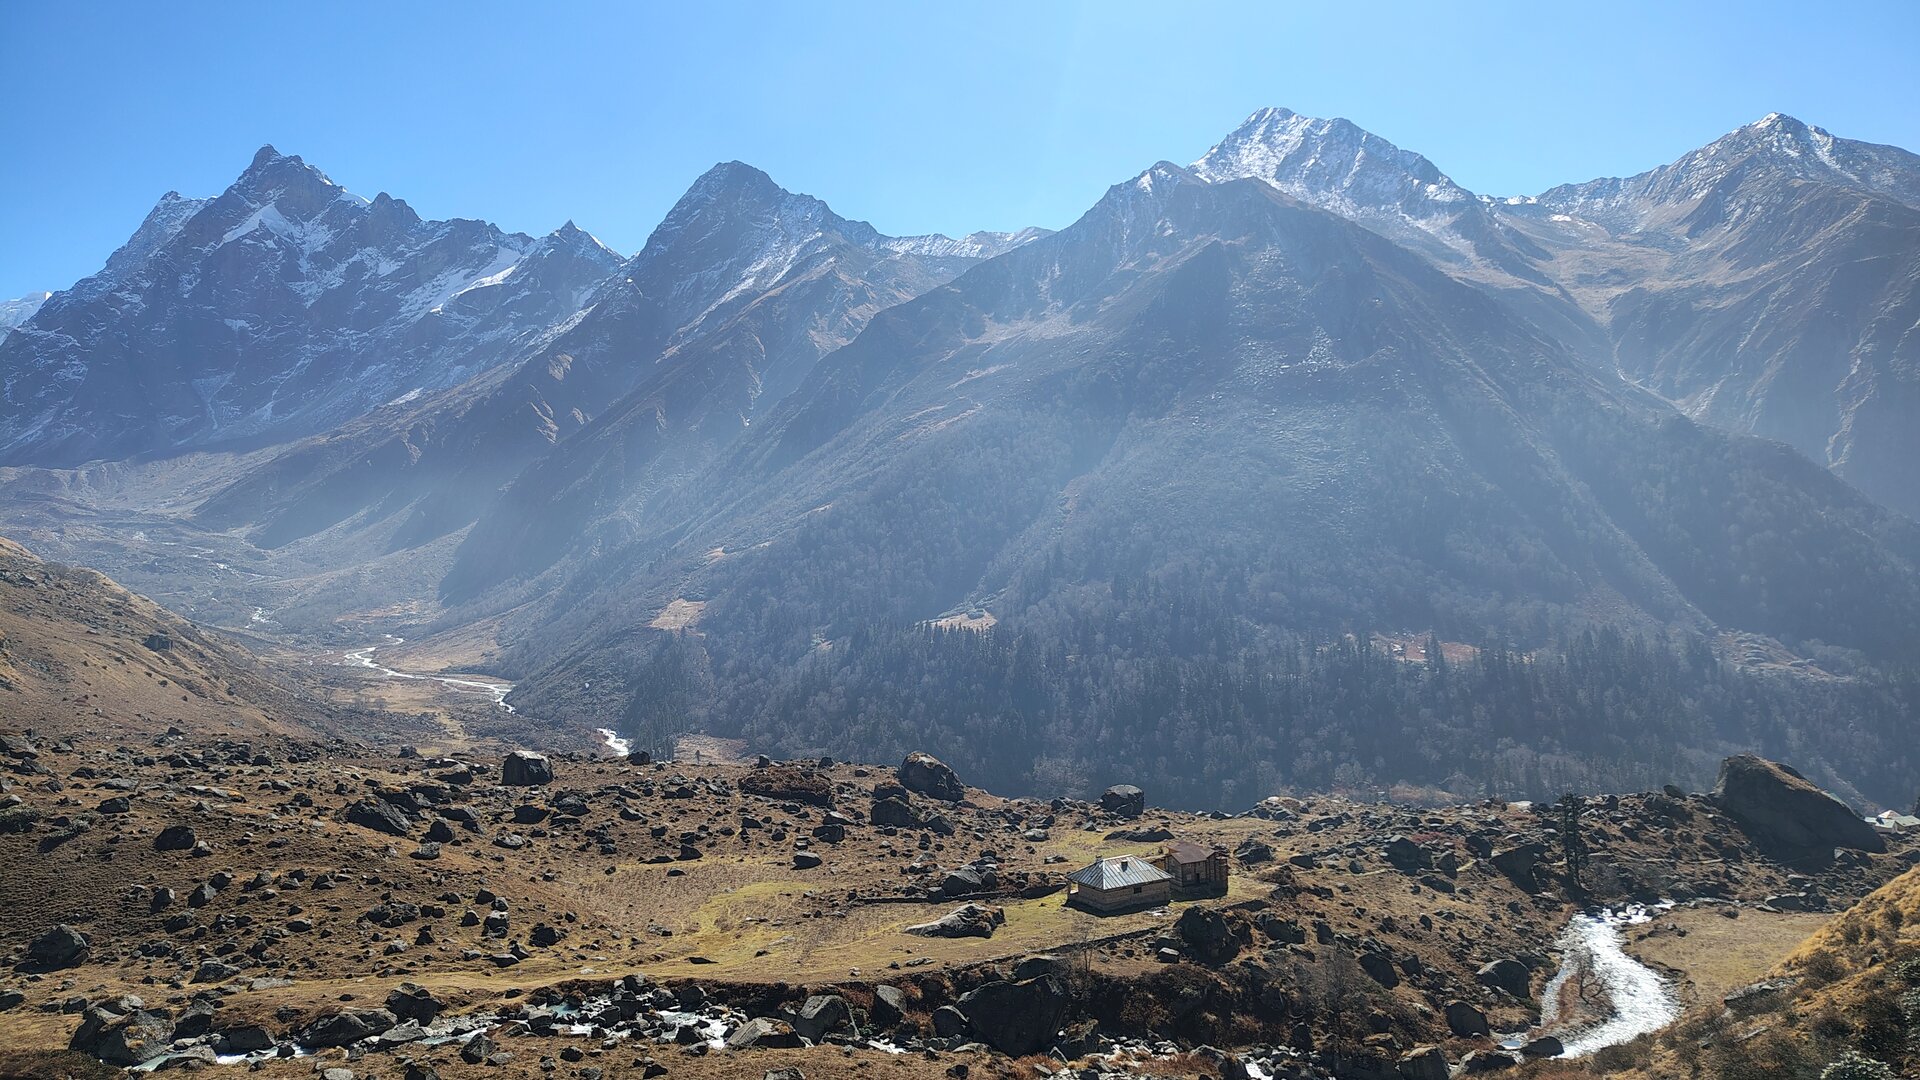
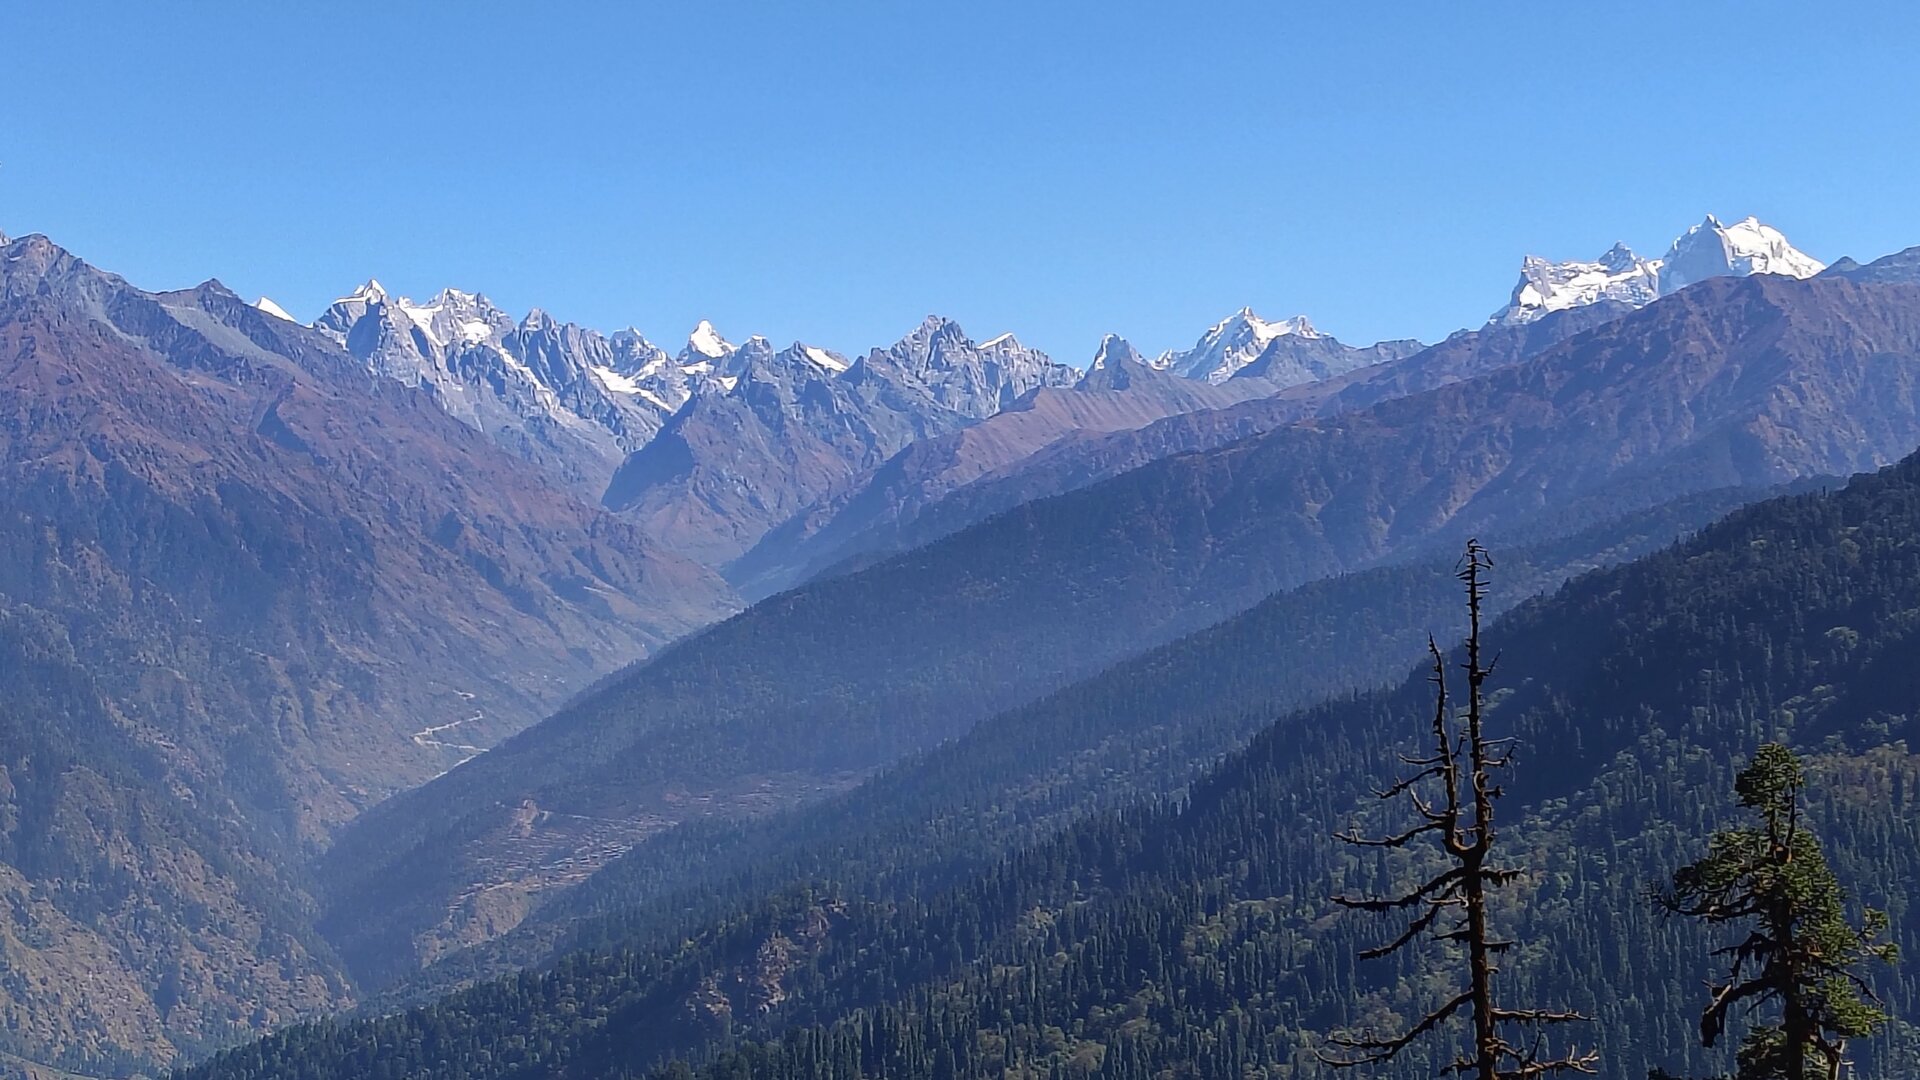
Beyond Juda Ka Talab, the trail climbs steadily toward Kedarkantha Base. The forest thins, giving way to vast white clearings and gentle slopes that roll endlessly toward the horizon. This is where the mountains begin to feel grand and open. From camp, the silence is profound — broken only by the flutter of prayer flags and the distant whisper of wind over snow. Nights are cold, but unforgettable: breath hanging in the air, constellations sharp and close, and the sense of standing deep within the Himalayas, far from anything familiar.
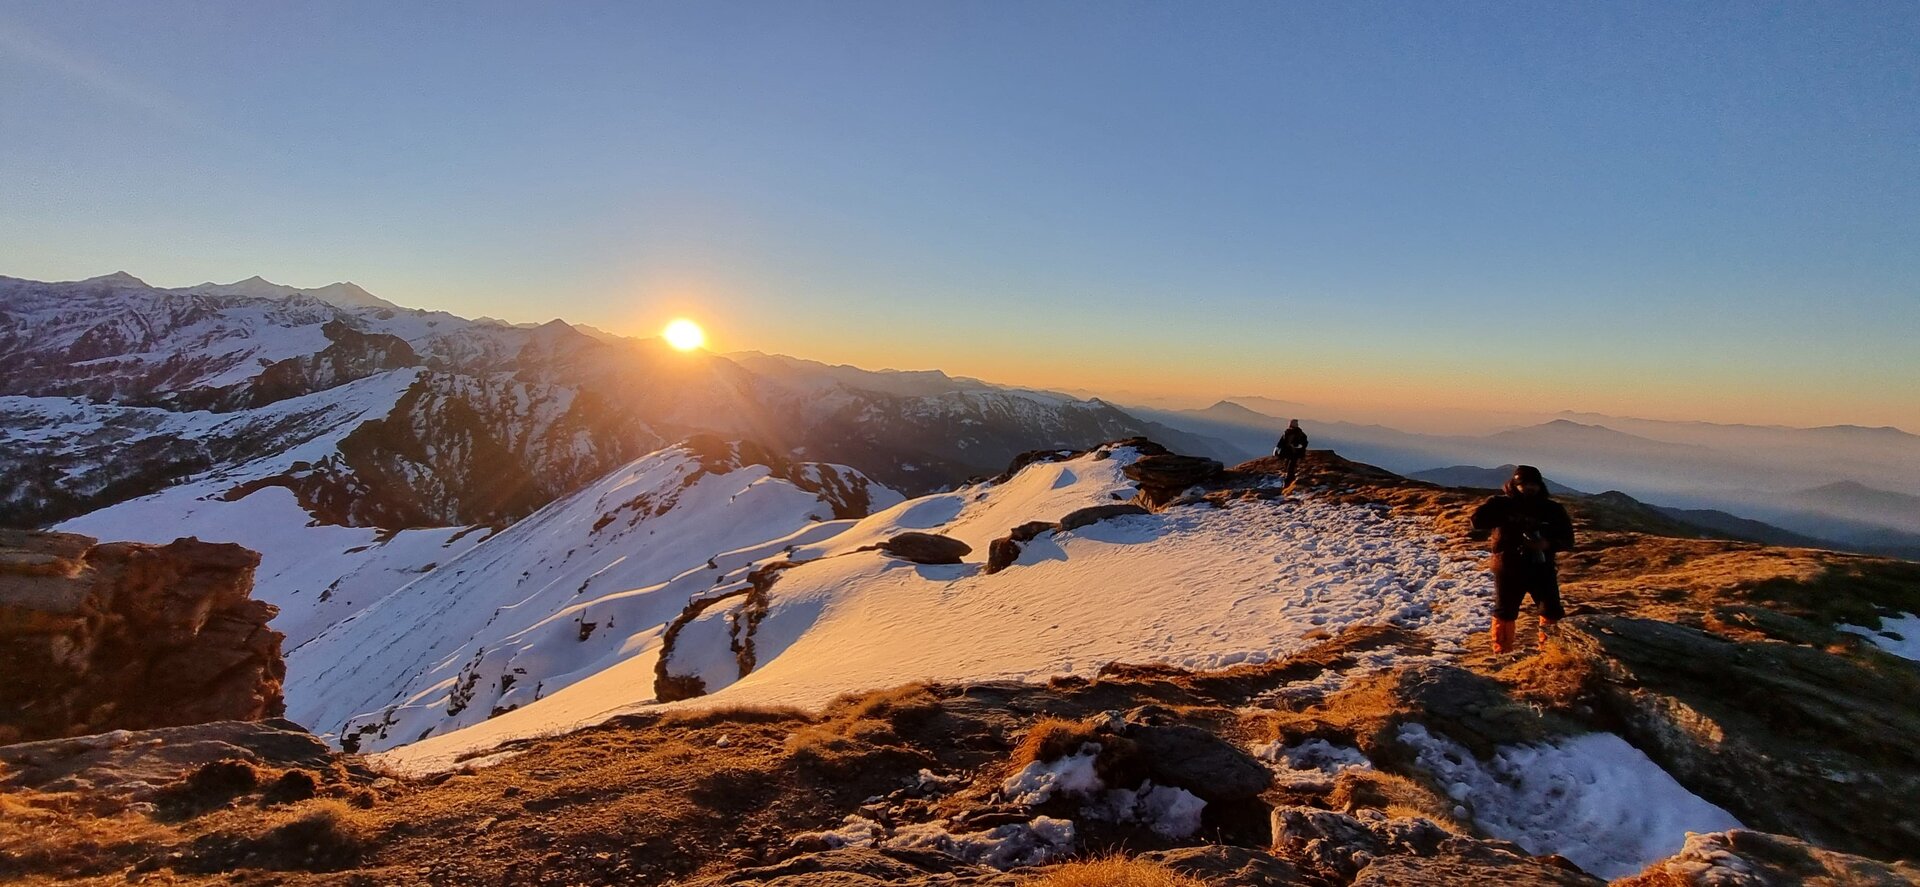
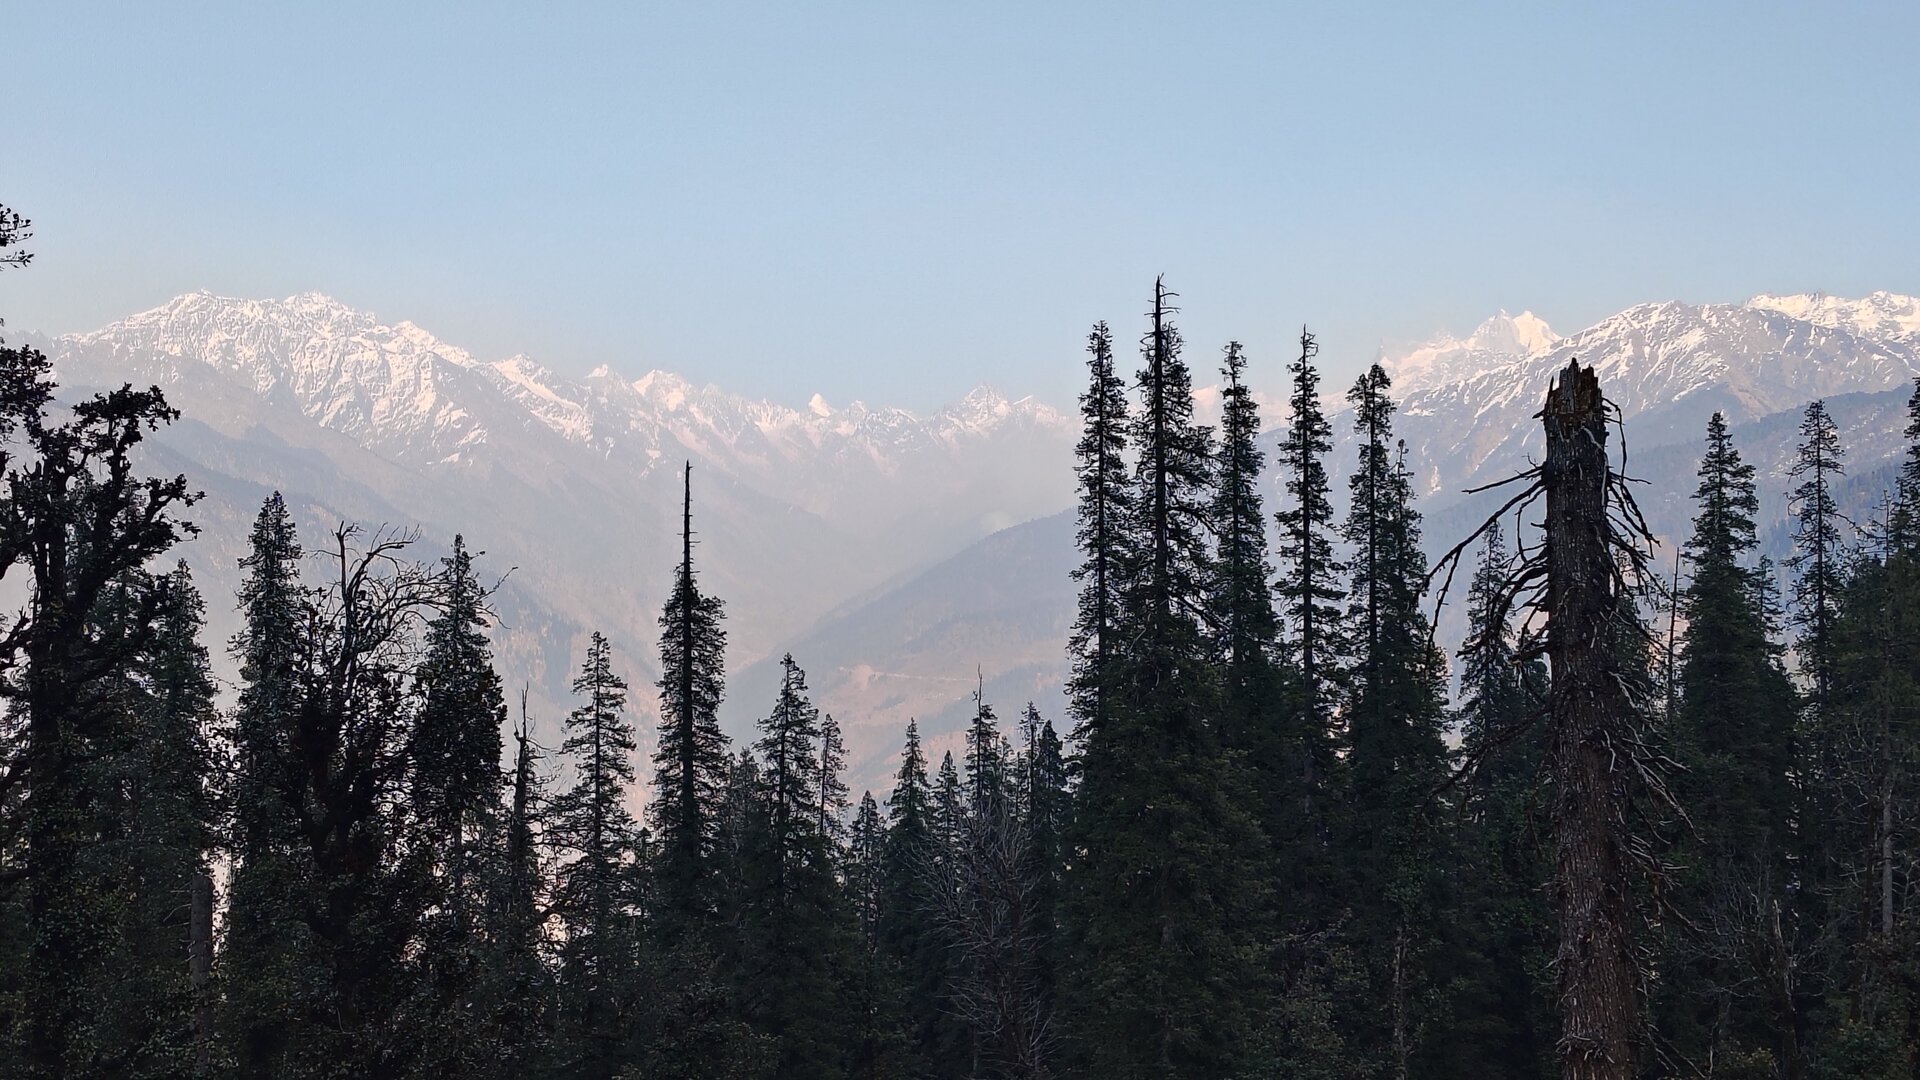
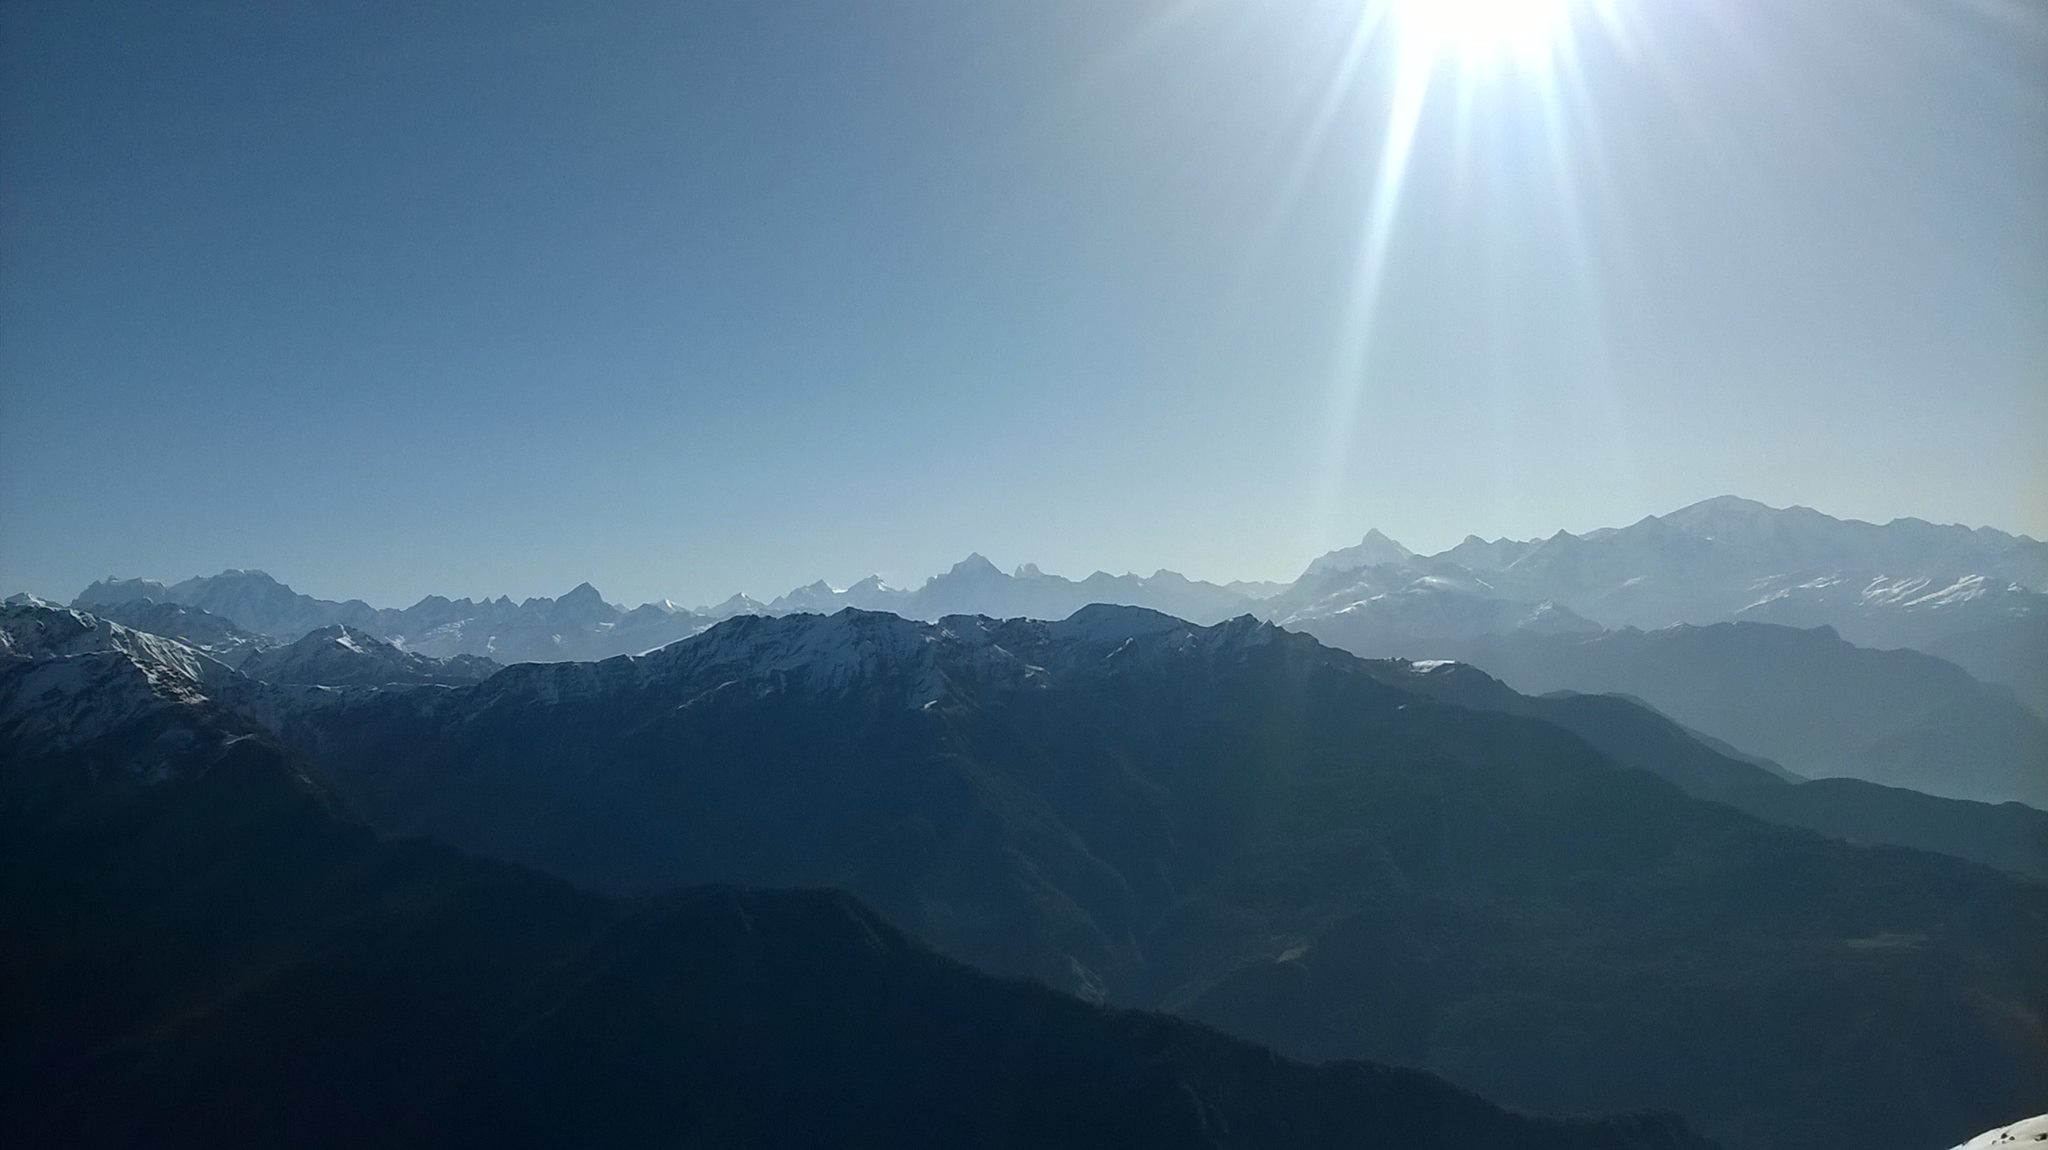
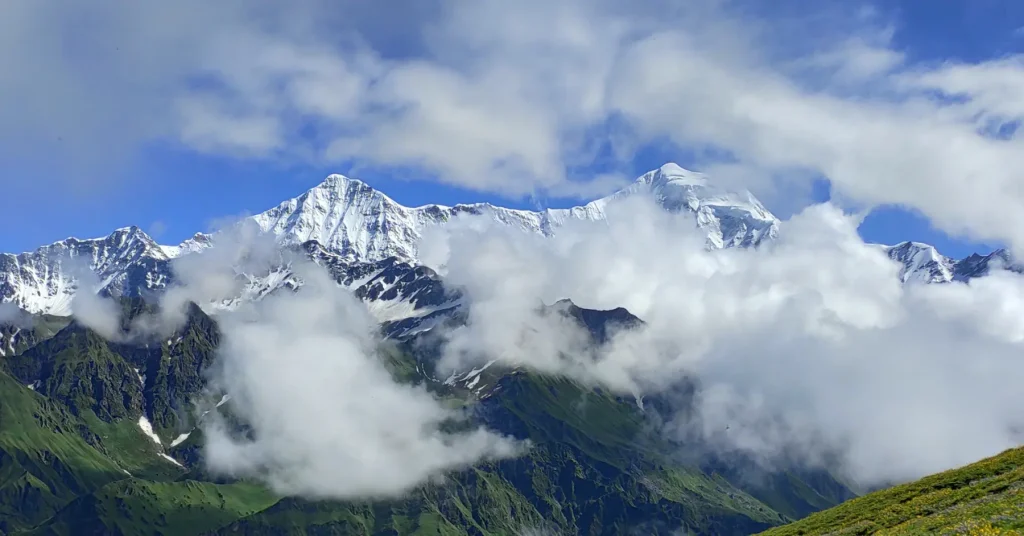
Summit day arrives before dawn. Headlamps glow softly as you begin the final ascent, boots biting into fresh snow as the slope rises above the treeline. With each step, the sky lightens — deep blues giving way to amber and gold. And then, suddenly, you are there. At 12,500 ft, the Kedarkantha summit opens into a vast Himalayan theatre. Swargarohini stands tall and commanding, Bandarpoonch and Black Peak line the horizon, and far below, the valleys of Har Ki Dun and Rupin stretch endlessly into the distance. As sunrise ignites the peaks in shades of fire and gold, time seems to pause — the world silent, immense, and breathtakingly alive.
Kedarkantha is more than a winter trek. It is a journey through silent forests, frozen lakes, open alpine slopes, and unforgettable summits — a perfect balance of adventure and beauty. Whether it’s your first experience of snow or a return to the mountains you love, this trek leaves you with something rare: the feeling of truly walking inside winter itself.
Read More
Highlights
✅ Summit climb with 360° views of Himalayan peaks like Swargarohini, Bandarpoonch, and Black Peak
✅ A true snow trek — trails and meadows covered in deep powder during peak winter
✅ Dense forests of pine, oak, and rhododendron inside Govind Pashu Vihar National Park
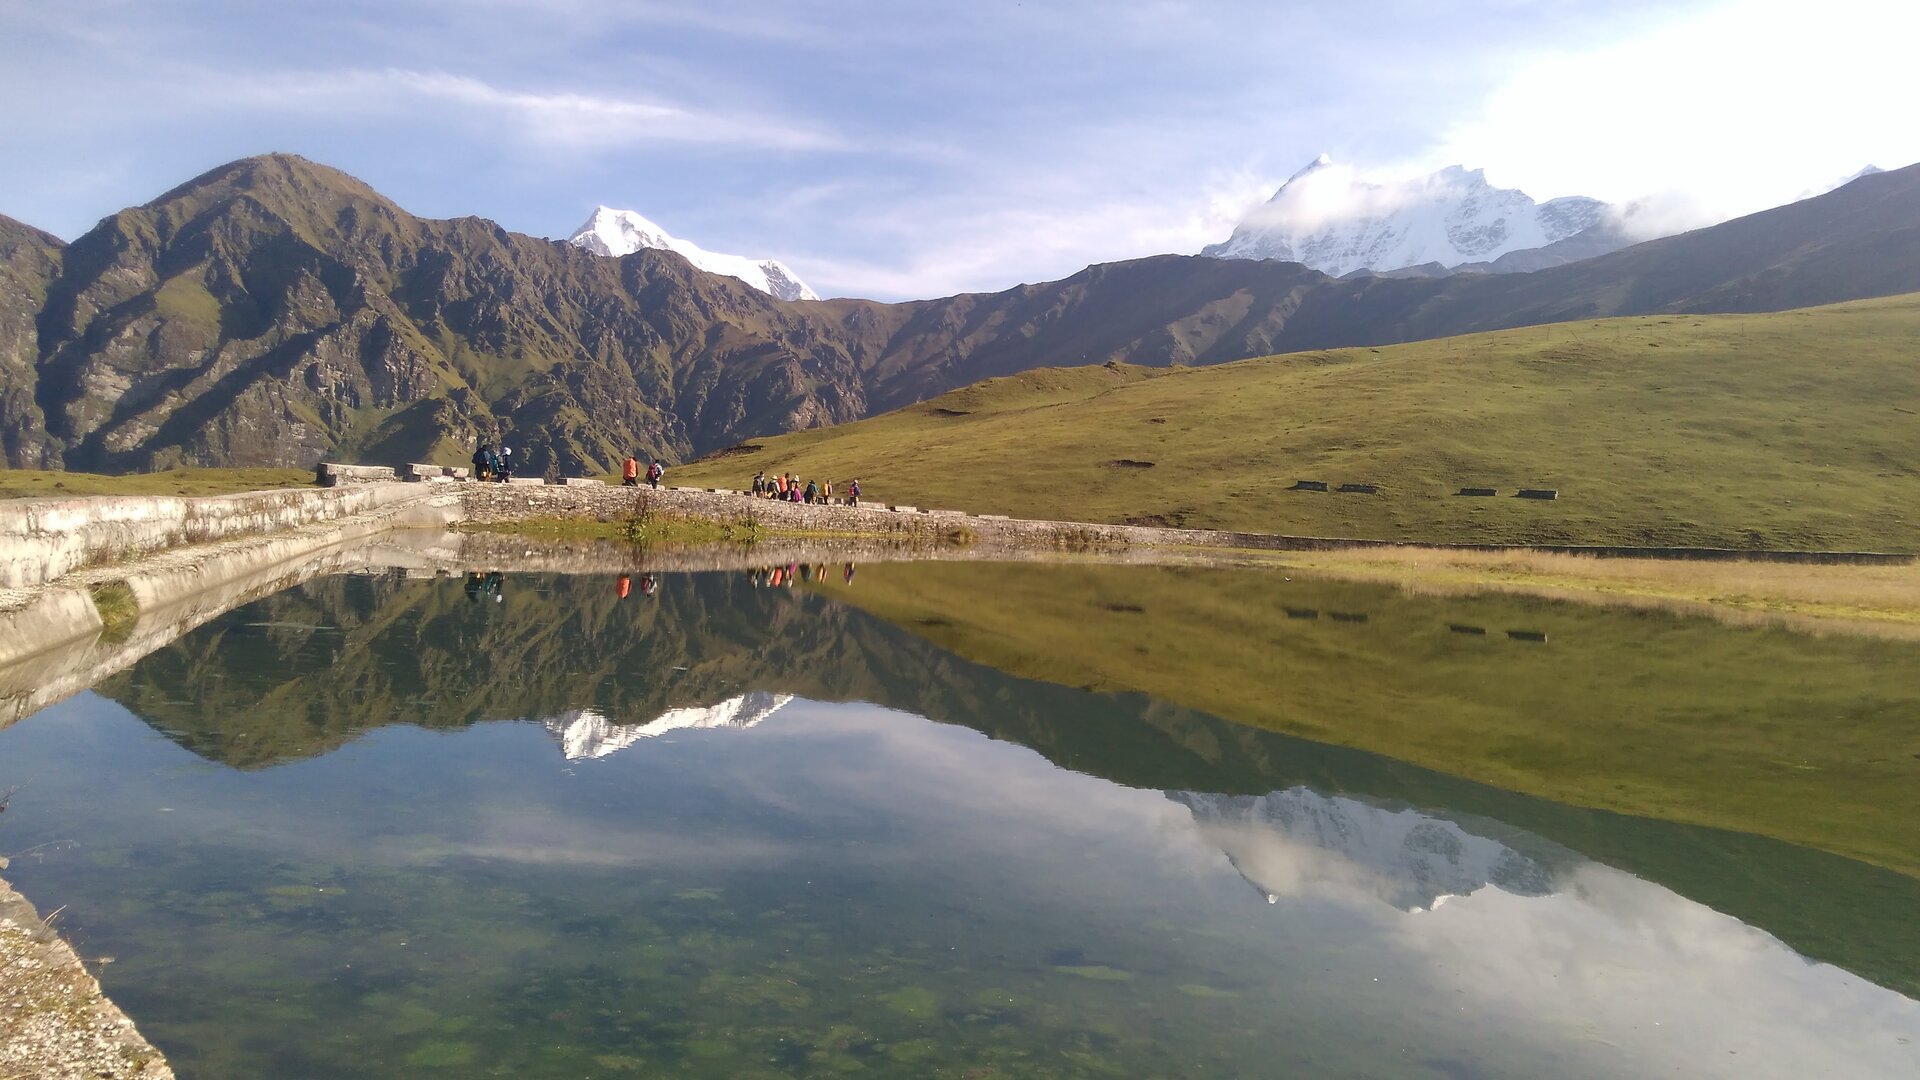
✅ Beautiful campsites like Juda Ka Talab and Hargaon
✅ Rich Garhwali culture with temples, folklore, and warm hospitality
Itinerary
?
• The journey to Kedarkantha begins long before the first step on the trail — it begins on the road to Sankri. For those opting for shared transport, our pickup vehicle meets participants in Dehradun, with exact pickup point and driver details shared a day prior. As the city fades behind, the mountains slowly take over, and the rhythm of travel shifts from haste to anticipation.
Leaving Dehradun, the route bends through either Mussoorie or Vikasnagar, chosen carefully based on road and traffic conditions. Soon, the landscape opens into the broad valleys of the Yamuna River — one of the most sacred rivers of the Himalayas. Here, the Yamuna flows wide and calm, nourishing terraced farmlands and small settlements tucked into the hillsides. Waterfalls spill down rock faces, sunlight dances across fields, and the air grows noticeably cooler and cleaner.
Past Naugaon, the journey meets the Tons River — wilder, faster, and deeper than the Yamuna. From here onward, the road follows the Tons closely, winding alongside its roaring waters through dense forests and narrow mountain bends. The river has a raw, untamed energy, carving its way through the valley as the road climbs higher into Uttarakhand’s remote interior. Villages like Purola and Mori pass by quietly, their stone houses, wooden balconies, and prayer flags offering brief glimpses into mountain life untouched by hurry.
By evening, Sankri appears — a small, charming hamlet surrounded by pine-covered slopes and distant snow-lined ridges. This is where roads end and the trek truly begins. As night settles in, the village feels calm and welcoming, with crisp mountain air, softly lit guesthouses, and the first real sense of being deep in the Himalayas.
The day ends with an overnight stay in Sankri, allowing the body to rest, acclimatize, and prepare — because from tomorrow onward, the mountains will be explored on foot.
• Trek 4 km / 4 hrs, gradual ascent through dense pine, oak, and maple forests.
After an early breakfast in Sankri, the trail begins by walking past the forest office and the last cluster of houses in Saud village. For a short while, the path follows the road that leads toward the Har Ki Dun valley — a gentle warm-up before the mountains make their intentions clear. Soon, a sharp left turn pulls you away from the road and into a steadily rising trail, climbing firmly for nearly a kilometre on a recently paved stretch.
This initial ascent rewards effort with wide, sweeping views of the Har Ki Dun valley below — ridgelines layered one after another, forests spilling down slopes, and the sense of leaving the inhabited world behind. Gradually, the trail narrows and slips into the forest, where oak, fir, pine, maple, and rhododendron trees close in, forming a dense and comforting canopy overhead.
In spring, this section of the trail comes alive with colour — red and pink rhododendron blooms line the path, joined by smaller alpine flowers pushing through the forest floor. The air feels cooler here, quieter, broken only by footsteps and the occasional rustle of leaves. Small seasonal dhabas appear along the way, offering welcome pauses for warm tea, coffee, or a quick plate of maggi — simple comforts that feel earned on a steady uphill climb.
The ascent continues gradually but relentlessly all the way to Juda Ka Talab. To maintain rhythm and energy, it’s best to keep moving with short, regular breaks rather than long stops. During peak winter months, this route can be busy, with multiple camping grounds appearing well before Juda Ka Talab. It’s important to stay close to your guide and team to ensure you reach the designated campsite.
By around noon, the forest opens up and the campsite near Juda Ka Talab comes into view. After lunch and some well-deserved rest, take time to layer up and hike to the lake itself — a quiet, still stretch of water nestled deep within the forest. As evening approaches, the setting sun casts soft light through the trees, turning the surroundings golden. Choose a peaceful spot to take it in, but return to camp before darkness settles, ending the day wrapped in forest silence and mountain calm.
• Short trek of approx. 2–2.5 km / 2–3 hrs, climbing steadily from forested trails into open alpine meadows.
The morning at Juda Ka Talab begins unhurried and calm. If the day is clear, soak in the warmth of the early sun as it filters through the trees, lighting up the forest floor. Enjoy a relaxed breakfast at camp before starting the day’s short but rewarding hike toward Kedarkantha Base Camp.
The trail begins by walking past Juda Ka Talab itself, after which it turns sharply uphill to the right. This section climbs steeply for about 1 to 1.5 km and forms the most demanding part of the day. The ascent is steady and continuous, encouraging a slow, comfortable pace. Midway through the climb, a small seasonal dhaba offers a welcome break — a good spot to pause, catch your breath, and enjoy something warm.
Once the steep climb ends, the trail eases into a gentler stretch — an almost straight walk of roughly a kilometre through dense forest. Here, sunlight streams in softly through the canopy, creating a beautiful play of light and shadow. When snow blankets the ground, the forest turns into a quiet winter wonderland, making this section one of the most scenic parts of the trek.
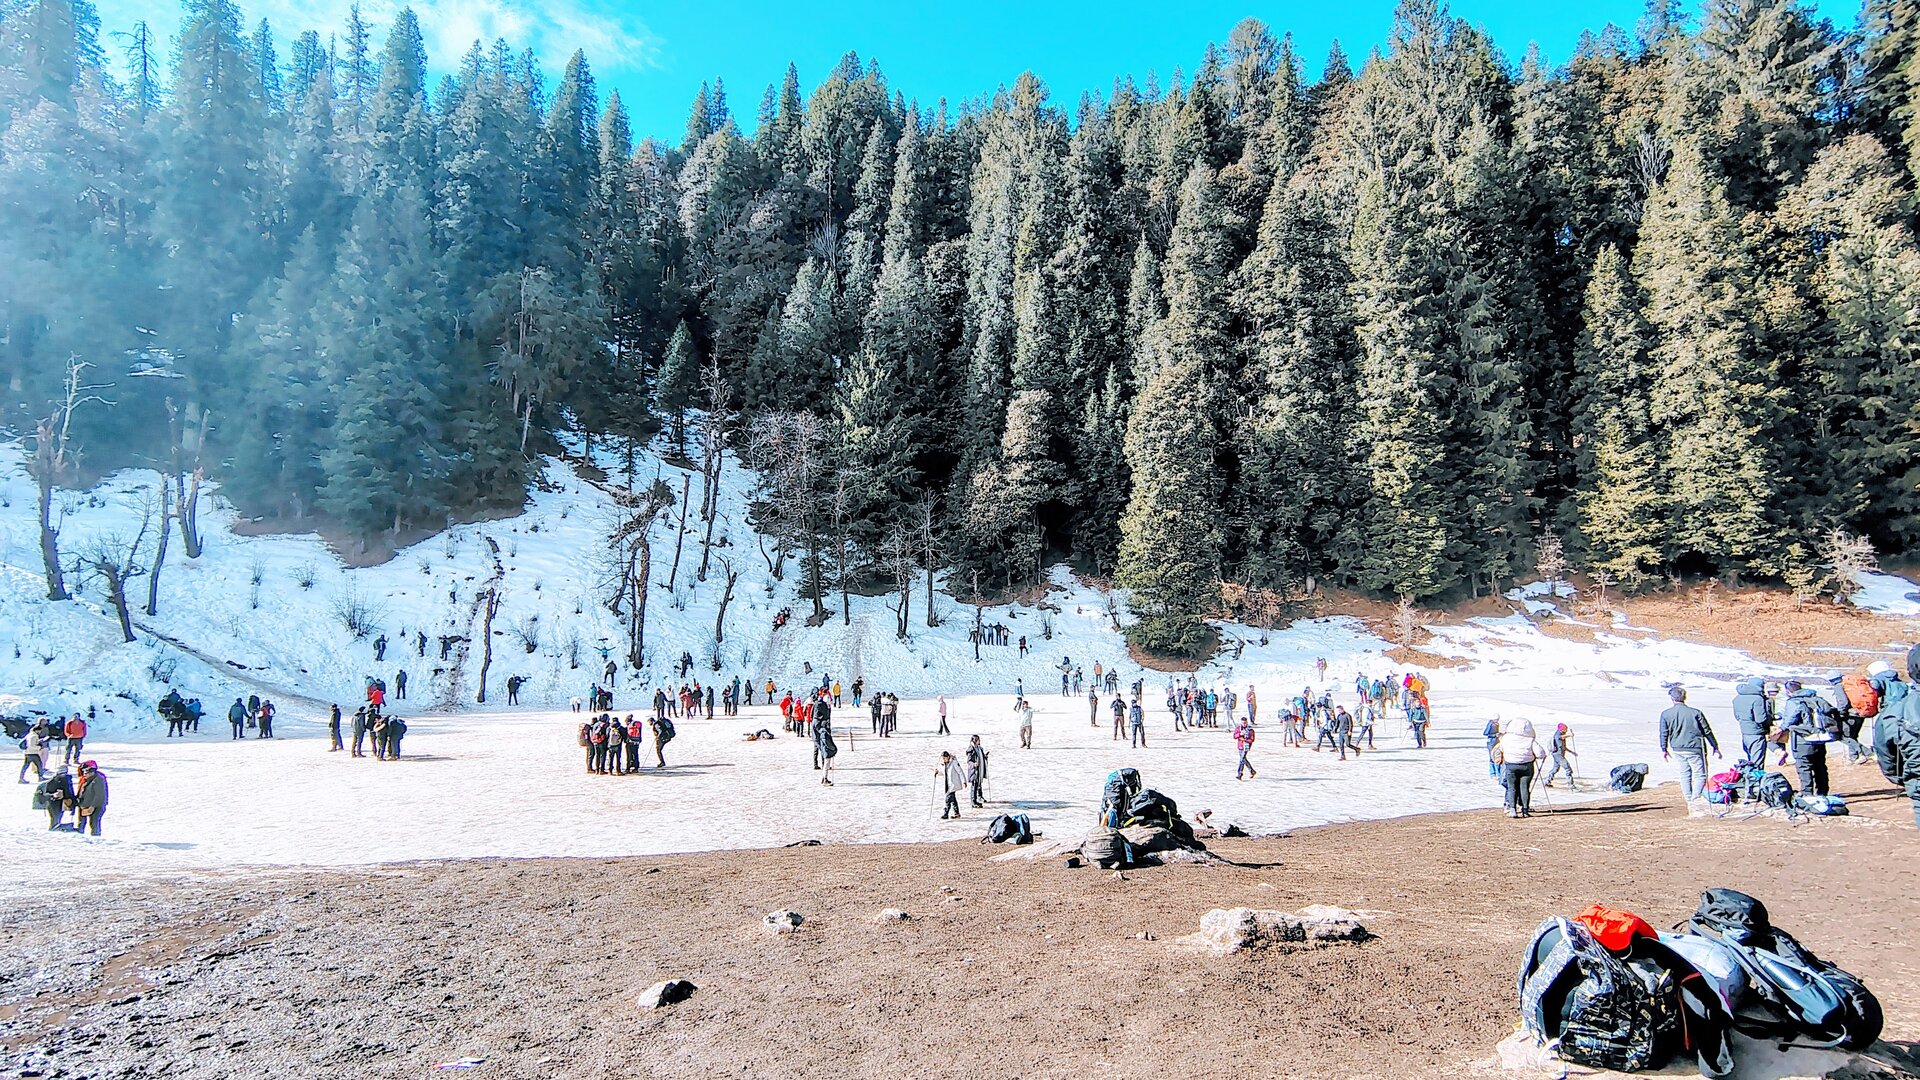
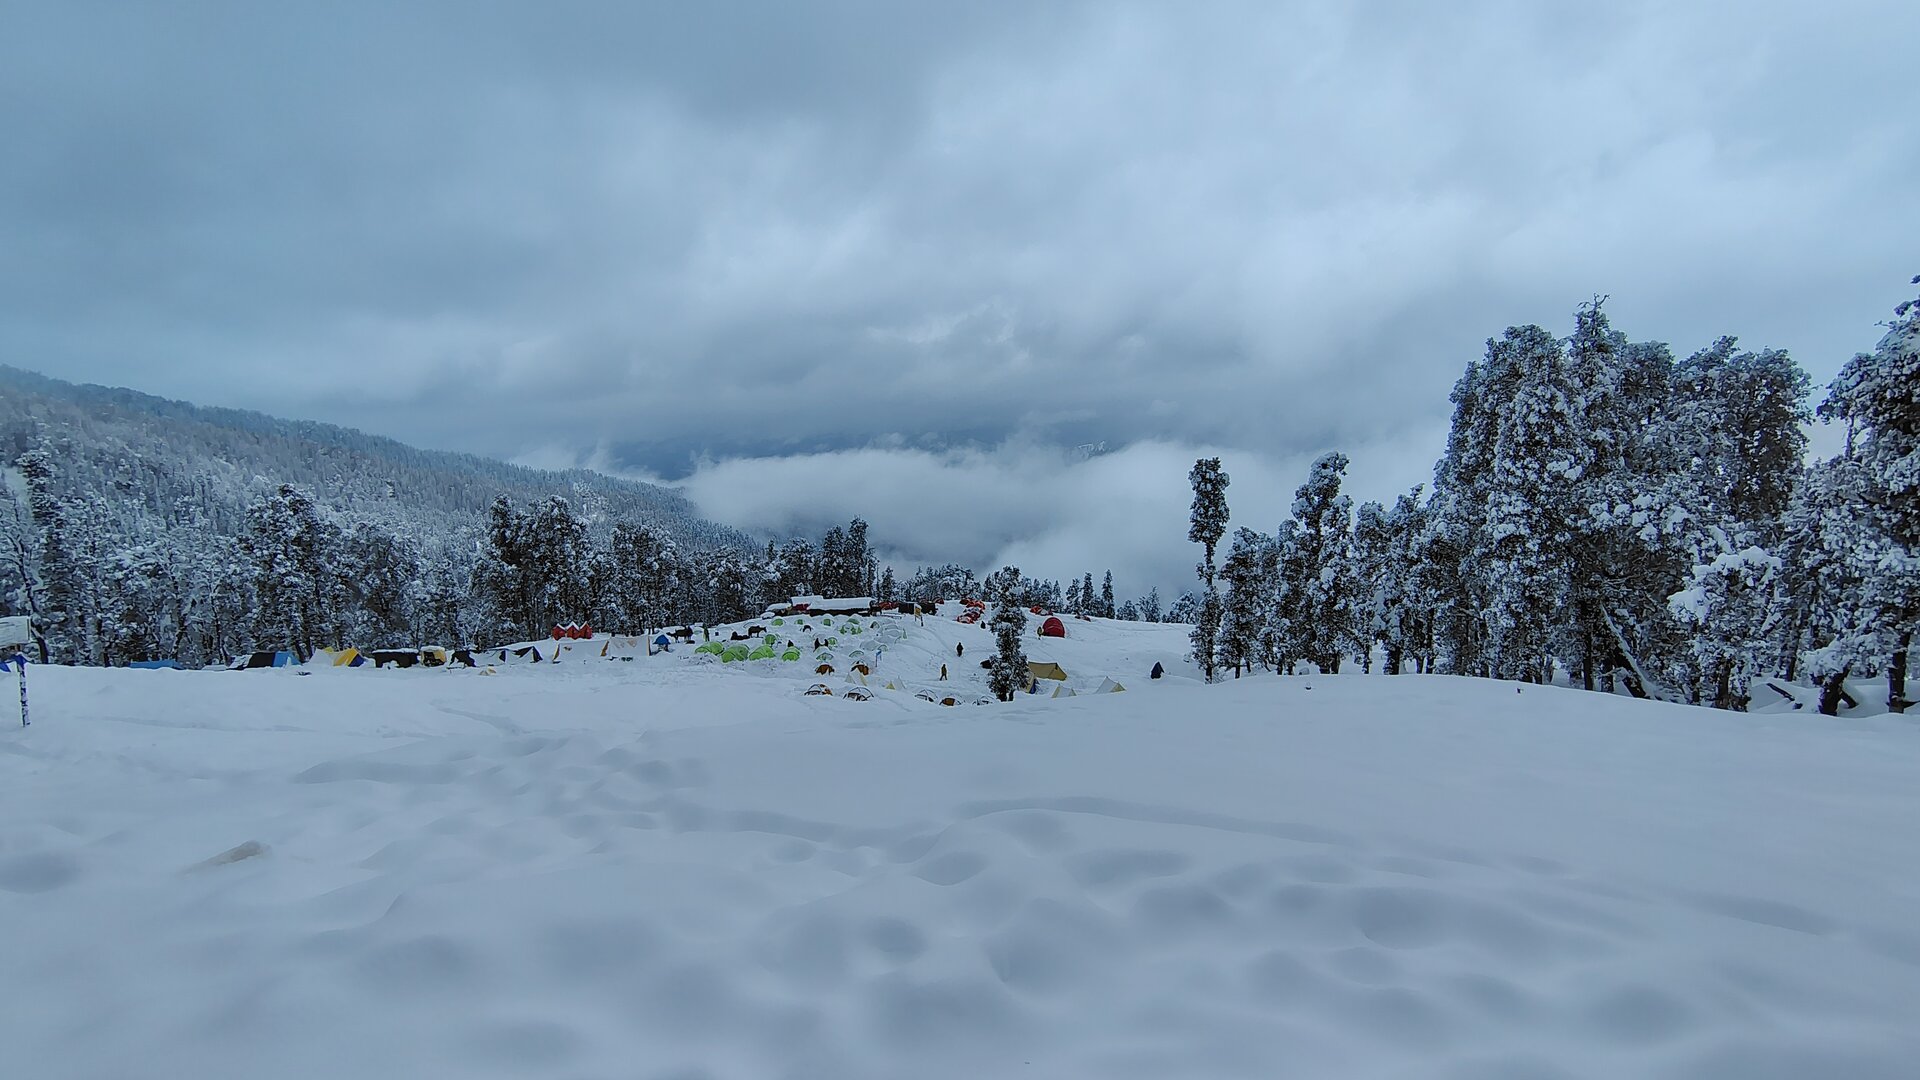
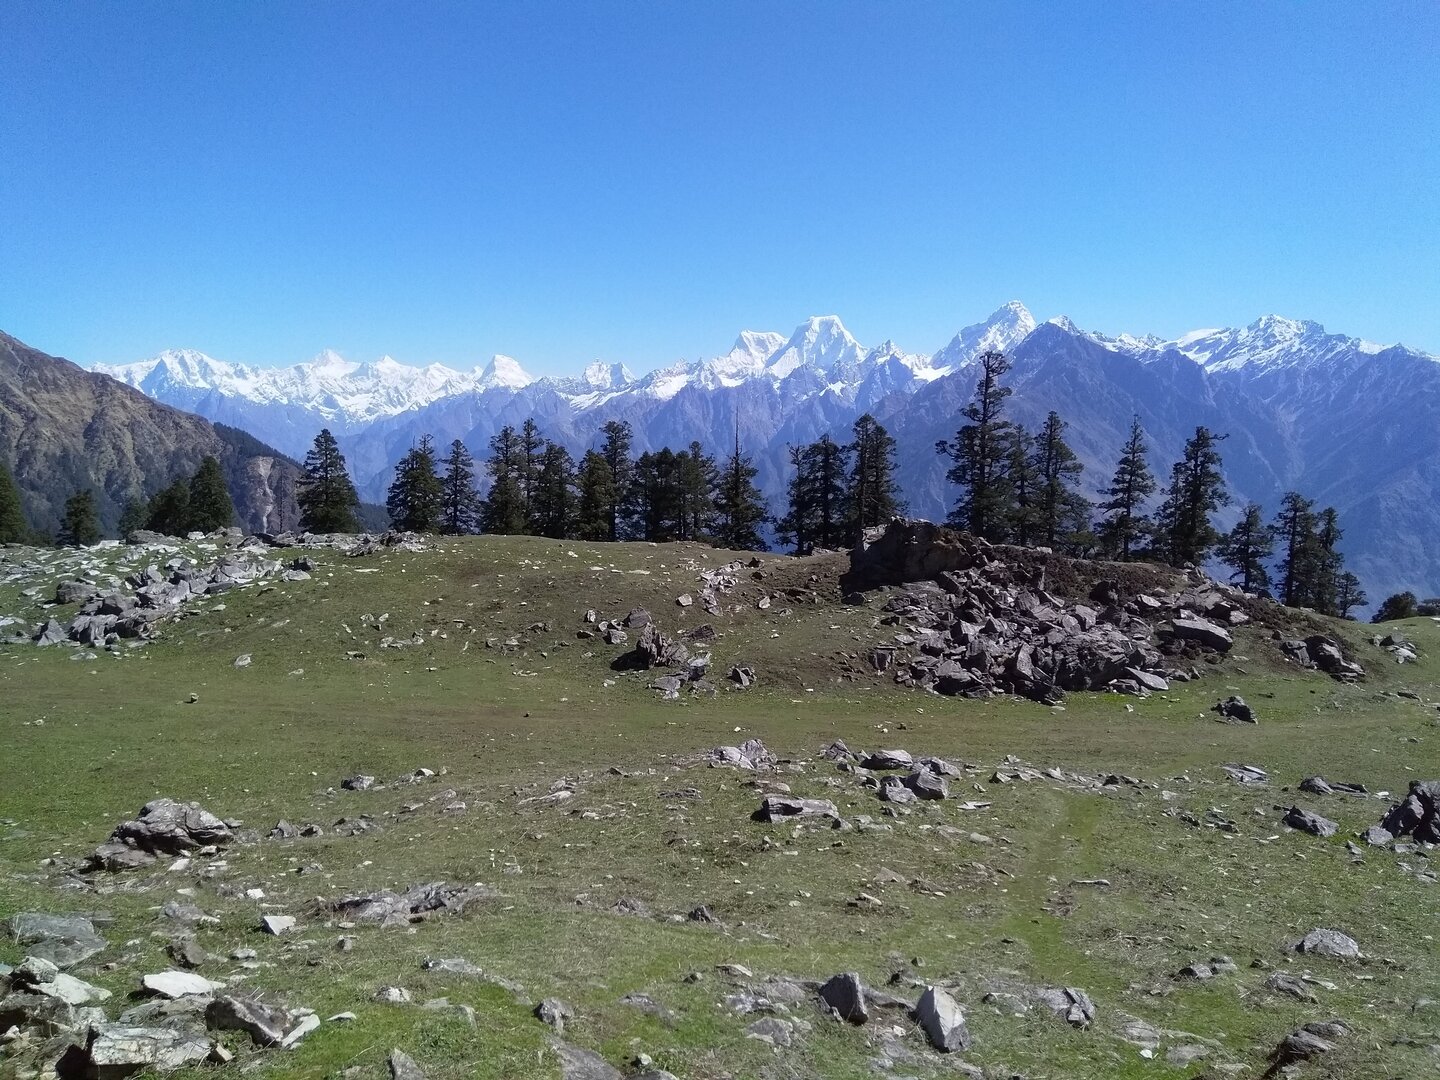
As the forest thins out, the landscape opens dramatically into a vast alpine meadow — the Kedarkantha Base Camp. This expansive clearing is an ideal campsite, offering grand, cinematic views of mountain ranges stretching across the southern horizon. During peak season, the meadow fills with tents accommodating thousands of trekkers, so it’s important to stay close to your guide and team to locate your designated camping area.
Standing tall to the north is your destination for the next day — the Kedarkantha summit at around 12,000 ft. In winter, its snow-covered slopes give it the unmistakable look of a true Himalayan peak, drawing your eyes upward and building anticipation for the climb ahead.
After settling in, take a short break followed by lunch at camp. As evening approaches, layer up well — temperatures drop quickly here once the sun dips. With ample daylight remaining, explore the meadow, visit nearby dhabas if open, or simply sit back and take in the scale of the surroundings.
Join the briefing session led by your trek leader, covering important tips and preparation for the early-morning summit climb. As the day winds down, don’t miss the sunset — Kedarkantha Base Camp is known for its stunning evening views, with the sky glowing in shifting hues as the mountains fall into shadow. Turn in early for the night, resting well for the summit push that begins long before dawn.
• Early morning summit attempt followed by a long descent — approx. 14 km total trekking, making this the final and most rewarding day of the journey.
The final day begins much before sunrise, awakened by your trek leader’s call cutting through the still, freezing air of Kedarkantha Base Camp. Outside, the meadow lies silent under the stars, temperatures well below freezing. This is not a morning for hesitation — layer up quickly, cover your face and hands, and prepare yourself mentally and physically for the summit push. A quick breakfast of warm porridge and hot tea fuels the body before stepping into the darkness.
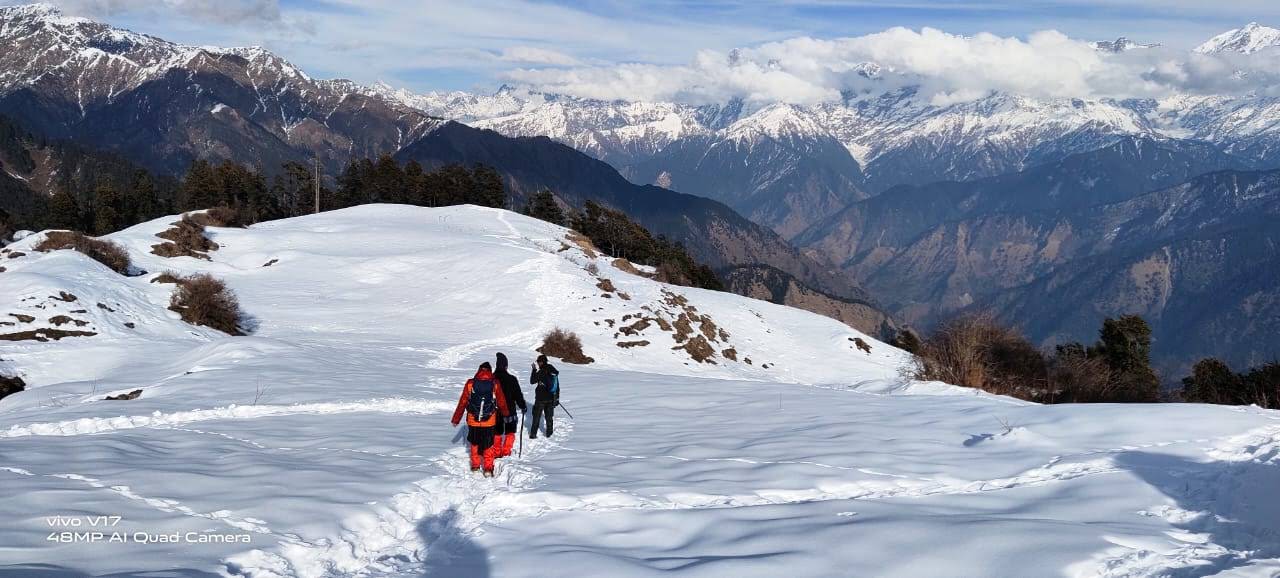
With headlamps switched on, the team sets off together, staying close to the guide and maintaining a slow, steady rhythm. The key is consistency — moving too fast leads to sweating, which quickly turns into biting cold once you stop. Instead, a calm, deliberate pace keeps the body warm as the trail climbs steadily upward through snow-covered slopes.
After a few hours, the last trees fall away and the terrain opens up completely. You emerge into wide, exposed meadows — vast, windy, and stunningly beautiful. Kedarkantha now feels close, almost within reach. A small seasonal dhaba appears along the route, offering a brief shelter to warm up before continuing — the stop is short, as lingering too long in the cold is never advisable.
From here, the gradient eases slightly, but the altitude and wind add their own challenge. Soon, you find yourself standing right beneath the Kedarkantha peak, rising tall and snow-clad against the early morning sky. As the eastern horizon begins to glow deep orange, a quiet excitement builds — sunrise is less than an hour away, and so is the summit.
The final stretch is the steepest and most exposed section of the entire trek. Sharp drops line either side of the narrow trail, and strong, bone-chilling winds demand focus and careful footing. There’s no need to rush — slow, steady steps are all it takes. With every move upward, the sky continues to change colour, urging you forward.
Reaching the summit feels surreal. The trail opens onto a broad, flat top scattered with large boulders and marked by a small temple. As the sun rises, warm light spills across the Himalayan ranges, illuminating distant peaks and valleys far below. The cold fades into the background, replaced by a deep sense of satisfaction and quiet achievement — a moment that stays etched in memory long after the trek ends.
After spending time on the summit capturing memories and soaking in the views, the descent begins carefully. Depending on snow conditions, parts of the trail may allow for controlled glissading — always under your trek leader’s guidance. By late morning, you return to Kedarkantha Base Camp for a well-earned rest and lunch.
After lunch, the journey continues downhill — a long but gentle descent all the way back to Sankri. The trail retraces familiar forest paths, gradually dropping in altitude as pine and oak trees close in once again. Fatigue mixes with contentment as each step brings you closer to warmth, roads, and rest.
By late evening, you arrive back in Sankri, marking the true end of the trek. After freshening up at the guesthouse, enjoy a warm dinner and reflect on the journey — from silent forests and snow-covered meadows to the unforgettable summit sunrise. Settle in for a well-deserved night’s rest.
The following day is reserved for departure. Guests may check out of the guesthouse before noon, concluding the Kedarkantha trek with memories that linger long after the mountains are left behind.
✅Kedarkantha lies inside Govind Pashu Vihar National Park, home to Himalayan black bears, snow leopards, musk deer, and a variety of pheasants and eagles.
✅The Kedarkantha summit is marked by a sacred Lord Shiva temple; locals believe the peak is blessed, adding spiritual charm to the trek.
✅"Kedarkantha" translates to "Throat of Lord Shiva" in Garhwali folklore, symbolizing divine protection of the valley.
✅Juda Ka Talab is said to have formed when Lord Shiva dropped a droplet of water from his hair, giving it a mystical allure.
✅Trekkers can spot rare Himalayan flora like rhododendrons, junipers, and medicinal herbs along the trail.
✅The route was historically used by shepherds moving flocks between alpine meadows, and remnants of traditional stone huts can still be seen.
✅Birdwatchers often spot Himalayan monal, golden eagles, and woodpeckers in the forests along the trek.
✅Local Garhwali villages along the route maintain centuries-old traditions, festivals, and architecture, offering a glimpse into Himalayan culture.
Route Map
How to reach
✈️ Air:Nearest Airport: Jolly Grant Airport, Dehradun (approx. 220 km from Sankri).
🚆 Train:Nearest major railway station: Dehradun (approx. 200 km from Sankri).
🛣️ Road:Regular buses and shared jeeps available from Dehradun to Sankri via Purola and Mori (8–9 hrs).
🗺️ Travel Tip:Arrive in Dehradun a day early to avoid delays and to catch the morning transport to Sankri.
Gallery
TrekFAQs
The trek is beginner-friendly but requires a basic level of fitness. It’s perfect for first-time snow trekkers, families, and groups looking for a scenic Himalayan winter adventure.
December to April is ideal, with January and February offering the thickest snow cover. Winter conditions provide stunning snow-laden meadows and clear views of peaks like Swargarohini and Bandarpoonch.
Carry insulated jackets, thermal wear, waterproof trekking shoes, gloves, woolen hats, a 30–40L backpack, trekking poles, and sunglasses for snow glare. A full winter packing checklist is in the downloadable PDF.
Yes, overnight stays are in well-equipped tents at scenic campsites. Snow camping during winter requires warm sleeping bags, which are provided by trek organizers.
Network coverage is limited. You may get signal at Sankri village, but the higher sections, including the summit, are offline. Inform friends and family beforehand.
No special permits are required, as the trek lies within Uttarkashi district. Local operators typically handle any minor permissions if needed.
The trek transforms into a snow paradise during winter. Trails pass through dense pine and deodar forests blanketed in snow, open meadows turn into perfect skiing slopes, and sunrise views from Kedarkantha summit over the snow-covered Garhwal peaks are unforgettable.
Yes, snow-covered trails can be slippery, and cold temperatures can drop below -5°C at night. Proper gear, trekking poles, and guidance from experienced guides ensure a safe experience.
Every journey with us is carefully crafted for a deeply personal mountain experience.
Not Just a Trek — A Journey That Stays With You
Every trail we walk is a carefully chosen path into the heart of the Himalayas — not just to witness their grandeur, but to feel them under your skin and soul. Our treks are designed not as bucket list checkmarks, but as life-affirming journeys. At Planethimalayas, we believe a mountain journey is deeply personal — and that belief runs through everything we do.
Individual Care, Every Step of the Way
We keep our groups small and intimate so we can focus on you — your pace, your concerns, your joy. From pre-trek guidance to trail-side support, our leaders walk with intention, offering safety and attention without intrusion. It’s this deep care that turns strangers into friends and walks into memories.
Built on Genuine Love for the Himalayas
We don’t just operate in the Himalayas — we live and breathe them. From respecting mountain communities to following Leave No Trace ethics, our treks are shaped by humility and care. With Planethimalayas, your trek becomes a way of giving back to the mountains that give us so much.
Why Choose Us
Experience the difference of trekking with genuine mountain experts who truly care.
Trek Leader & Guide
Led by certified mountaineers with wilderness first aid training, ensuring your safety and confidence at every step.
Cook & Support Staff
Our mountain crew comprises local experts who bring unmatched experience, warmth, and deep knowledge of the region.
Small Group Size
We cap our group departures at just 8 trekkers — ensuring individual attention, deeper connections, and better trail discipline.
Safety Standards
From personal well-being to technical preparedness, we maintain the highest safety standards — using certified high-altitude gear and comprehensive safety protocols to ensure a secure and reliable Himalayan experience.
24×7 Online Support
We're always available — before, during, or after your trek. Reach out anytime, and you'll always hear back from a real human.
We Care for the Mountains
We strictly follow Leave No Trace ethics. Limited group sizes and mindful practices help protect the fragile Himalayan ecosystem.